
Kevin Whitfield, Features Reporter.
You are standing at the bathroom mirror with four half-used tubes of matte liquid lipstick lined up on the counter, none of them quite right. One went patchy by lunch. One made your lips feel like paper by hour three. One looked perfect in the store light and strange in your kitchen. The question you actually type into a search bar at 11 p.m. is some version of: why does this keep happening, and what am I doing wrong. Usually, nothing. Matte liquid lipstick behaves differently from cream or gloss formulas because it dries down into a thin film, and that film reacts to what is underneath it: how hydrated your lips are, how you apply it, how long you wait before eating or talking. A 2021 study in the International Journal of Cosmetic Science found that lip skin loses moisture roughly ten times faster than facial skin, which is one reason matte formulas that feel fine on a cheek can feel tight on a mouth. This guide walks through what actually matters before you buy, apply or judge a matte lipstick, and what you can safely ignore.
- Undertone testing works better in daylight than under any store light, since fluorescent and warm bulbs shift how a matte tint reads on skin.
- Prep matters more than formula, because a matte film seals in whatever state your lips were in when you applied it, flaws and all.
- Most matte lipstick failures are removal failures, not formula failures: stripping the film without conditioning first is what leaves lips feeling rough the next day.
Finding Your Undertone In Daylight
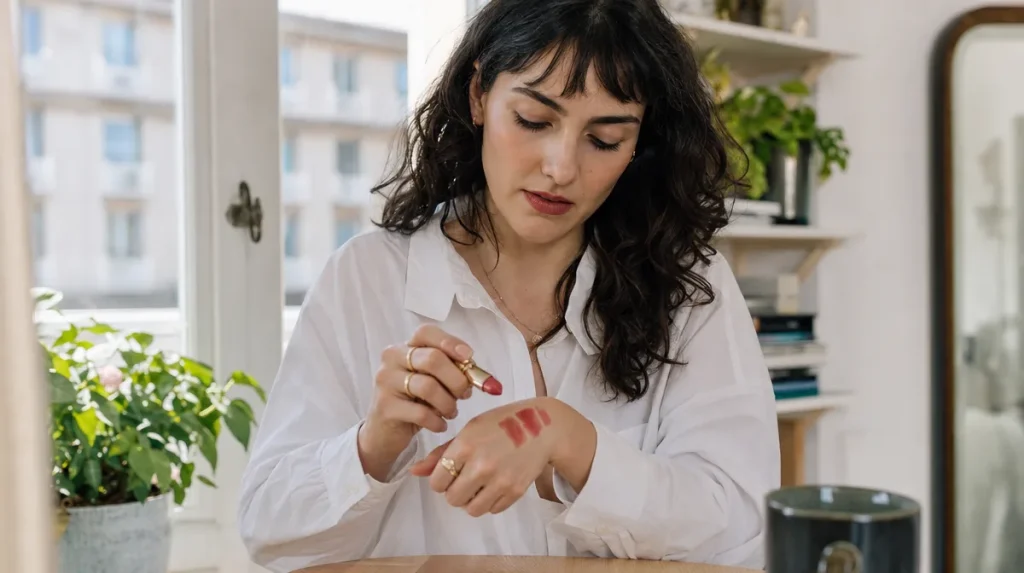
Store lighting is built to sell, not to inform. Most retail counters use warm, high-CRI bulbs that flatter almost anything, which is why a shade can look ideal under fluorescent light and slightly orange or ashy the moment you step outside.
The fix is simple: swatch on the inner wrist or the back of the hand, then walk to a window or a door within thirty seconds. Daylight, even on a grey day, carries more blue wavelengths than indoor bulbs and gives a truer read of how a pigment will sit against your skin.
Think of it the way a house painter treats a colour chip: nobody paints a wall from how the chip looks under a hardware store light. They tape it to the actual wall and check it morning and evening, because light changes everything about how a colour reads.
A quick self-test: swatch a shade, look at it under three light sources you already have access to, your bathroom, your phone flashlight, and a window, before deciding. If a colour still looks right in all three, it will likely translate to your lips.
Reading The Ingredient List Without A Chemistry Degree
Matte liquid lipstick formulas generally lean on film-forming polymers and volatile silicones or solvents that evaporate after application, leaving behind a thin, pigmented layer. That is the mechanism behind the long wear and the dry finish people either love or dread.
You do not need to memorize INCI names, but a few patterns are worth recognizing. Formulas listing several silicone-derived ingredients near the top tend to feel lighter and more flexible. Formulas relying heavily on alcohol as an early ingredient tend to dry faster and can feel tighter over several hours, particularly for people with naturally drier lips.
Consumer-testing publications, including Quebec’s Protégez-Vous, have long encouraged readers to check ingredient order rather than marketing claims on the front of a package, since the first five ingredients typically make up the bulk of any cosmetic formula. That habit applies just as well to lip products as it does to moisturizers.
A useful shorthand: if the label reads like a short list dominated by one or two solvents, expect a faster-drying, higher-maintenance formula. A longer list with conditioning agents further up tends to behave more gently, even in a matte finish.
The Patch Test Everyone Skips
Lip skin is thinner than facial skin and has no oil glands of its own, which makes it more reactive to new formulas than most people expect. Yet almost nobody patch tests a lipstick the way they would a new moisturizer or serum.
A reasonable middle ground: apply a small amount along the inner forearm or behind the ear and leave it for several hours before putting a new shade anywhere near your mouth, especially with a formula containing a fragrance or a novel pigment blend. The Canadian Dermatology Association’s general public guidance on cosmetic sensitivity recommends this kind of localized test for any new product applied to sensitive skin, lips included.
Mistakes happen here in a predictable pattern: someone tests the colour on their hand, likes it, and assumes the lip skin will react the same way. It often does not, precisely because lip skin absorbs and loses moisture differently.
If you notice tingling that does not fade within a few minutes, or visible redness, that is your answer regardless of how flattering the shade looked in the tube.
Prepping Lips So Matte Doesn’t Crack
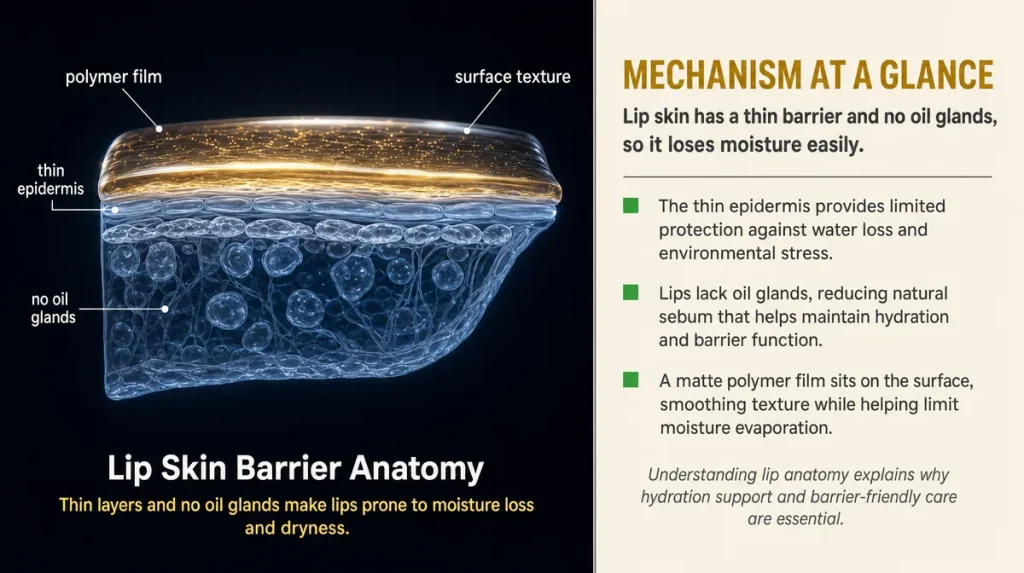
Because a matte film seals whatever is underneath it, texture problems tend to get worse, not better, once the product sets. Dry, flaking skin visible before application will still be visible, sometimes more so, once a matte layer sits on top of it.
The practical fix is a short routine, not a long one: a gentle exfoliation once or twice a week using a washcloth or a lip scrub, followed by a balm applied a few minutes before colour, giving it time to absorb rather than sitting as a slick layer the lipstick will slide on.
A household comparison helps here: applying matte lipstick over dry, flaky lips is a bit like painting a wall without sanding down old peeling paint first. The new coat will follow every crack in the surface underneath.
Self-test: press a fingertip gently on your lower lip. If you can feel or see rough patches, give your lips a day of balm before reaching for a matte formula, rather than trying to cover the texture with more product.
Application Order: Liner, Product, Setting
The order you apply things in changes how long a matte lipstick actually lasts, more than most people assume. Liner first, applied slightly inside the natural lip line rather than sharply outlining it, gives the liquid colour something to grip and helps prevent the feathering that happens as the product dries.
Apply the matte formula in thin layers rather than one heavy coat. A single thick layer takes longer to set and is more prone to cracking at the corners of the mouth, where movement is constant throughout a normal day of talking and eating.
A common mistake is applying the second coat before the first has fully dried, which effectively doubles the wet layer and pushes out the drying time considerably, sometimes by several extra minutes. Waiting sixty to ninety seconds between coats, roughly the time it takes to finish another step in a makeup routine, tends to produce a cleaner, more even finish.
Blotting with a single tissue immediately after the final coat, a technique many editors at Canadian titles like Chatelaine and The Kit have described in beauty columns over the years, can also help remove excess product before it fully sets, reducing the chance of transfer.
The Touch-up Mistake That Ages Your Look
Matte lipstick wears down unevenly, from the inside of the lips outward, because that is where friction from eating, drinking and talking concentrates. The visible result partway through the day is often a faded centre with a still-intact outer ring, which can look more obvious, not less, if you simply add a fresh coat on top.
The better habit is to gently blot or wipe away what remains before reapplying, rather than layering new product over old. Adding fresh matte formula on top of a partially worn layer tends to build texture unevenly and can settle into fine lines around the mouth, which becomes more noticeable as the day goes on.
A 2019 study in the Journal of Cosmetic Science examining wear patterns in long-lasting lip formulas found that reapplication over existing product visibly increased surface unevenness compared with removing residual product first.
If you are touching up in a car mirror or at a restaurant table, a quick wipe with a tissue takes seconds and generally produces a cleaner result than a fast reapplication over tired product.
Removing Matte Lipstick Without Stripping Your Lips
Matte formulas are designed to resist water and light friction, which is exactly why they can be difficult to remove without some extra help. Scrubbing with a dry tissue or hot water alone tends to pull at the thin lip skin rather than lifting the pigment cleanly.
An oil-based remover, or even a plain facial oil applied and left for a few seconds before wiping, tends to dissolve the film-forming polymers more gently than soap and water. Think of it the way a mechanic uses solvent, not soap, to lift grease from an engine part: like dissolves like.
A balm applied immediately after removal, while lips are still slightly warm from the process, helps restore some of the moisture lost during a full day of wear. This step is where most people quietly slip up: removing the colour and considering the routine finished, when the lips are often at their driest right at that moment.
Self-test: after removing lipstick, press a fingertip to your lower lip. If it feels tight rather than soft, that is a sign to apply balm now rather than waiting until bedtime.
Key Takeaways
Matte liquid lipstick rewards a bit of preparation more than it rewards chasing a specific formula. Undertone testing in real daylight, a short exfoliation and balm routine beforehand, thin layered application, careful touch-ups, and gentle oil-based removal will do more for how a matte finish looks and feels than switching products every few weeks. Individual skin sensitivity varies, and lip skin in particular can react differently than facial skin to new ingredients, so testing new formulas patiently remains the safest habit.
A Quick Checklist Before You Commit To A Shade
- Swatch on the back of your hand and check the colour under at least two different light sources, ideally including daylight
- Patch test a new formula on your inner arm several hours before wearing it on your lips
- Exfoliate gently and apply balm several minutes before applying colour
- Apply liner first, then thin coats of matte formula, waiting between layers
- Blot and remove worn product before touching up rather than layering on top
- Remove with an oil-based product rather than scrubbing, then follow immediately with balm
This article is intended for general information purposes and is not a substitute for individual dermatological advice.
Individual skin sensitivity and results may vary from person to person.