
Priya Nakamura, Staff Writer.
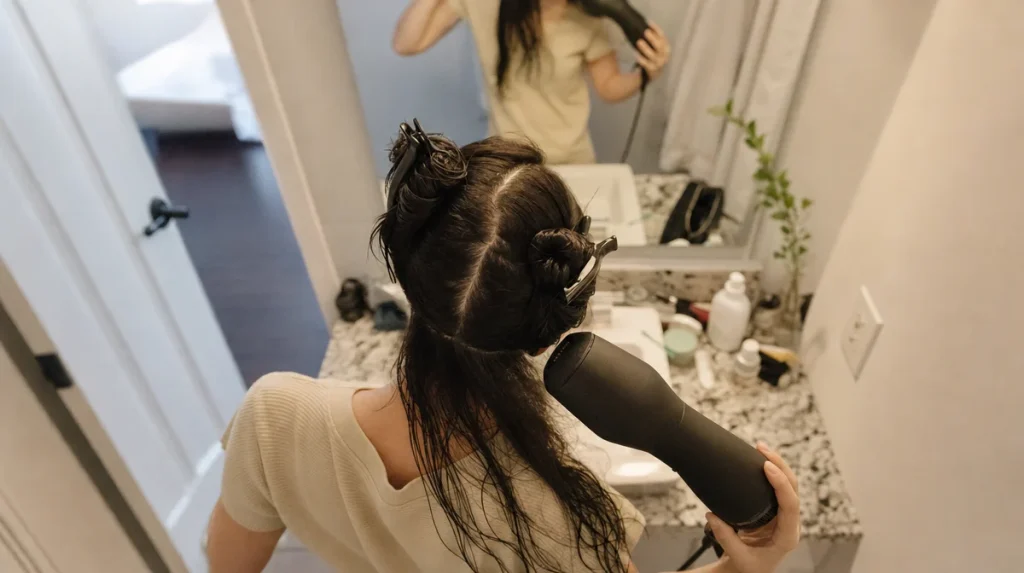
You are standing under the bathroom light with wet hair and fifteen minutes before you need to leave, and the dryer in your hand is doing the thing it always does: the front pieces go smooth, the back stays fuzzy, and by the time you reach the kitchen the humidity has already started undoing your work. You have wondered, more than once, whether the problem is the dryer itself, whether a newer model with a fancier name would finally fix it.
Probably not. Most of what determines whether hair comes out smooth or staticky has less to do with the machine and more to do with how it is used. An ionic dryer emits negative ions that help break water into smaller droplets so they evaporate faster, a mechanism described in drying-technology research published in the Journal of Cosmetic Science in 2021. But ions cannot fix a dryer held too close, aimed the wrong way, or run over hair that was never sectioned properly in the first place.
This guide is about technique: the handful of habits that make the dryer you already own perform closer to its actual potential, no new purchase required.
- Distance and angle matter more than wattage. Holding the dryer roughly fifteen centimetres away and pointing the airflow down the hair shaft does more for smoothness than any feature on the box.
- The cool shot button is not decorative. A short blast of cool air at the end of each section helps the cuticle lie flat, which is what actually locks in shine.
- Sectioning is the difference between five minutes of frizz and none. Drying hair in four or six defined sections, root to end, beats sweeping the whole head at once almost every time.
What “Ionic” Actually Does To Damp Hair
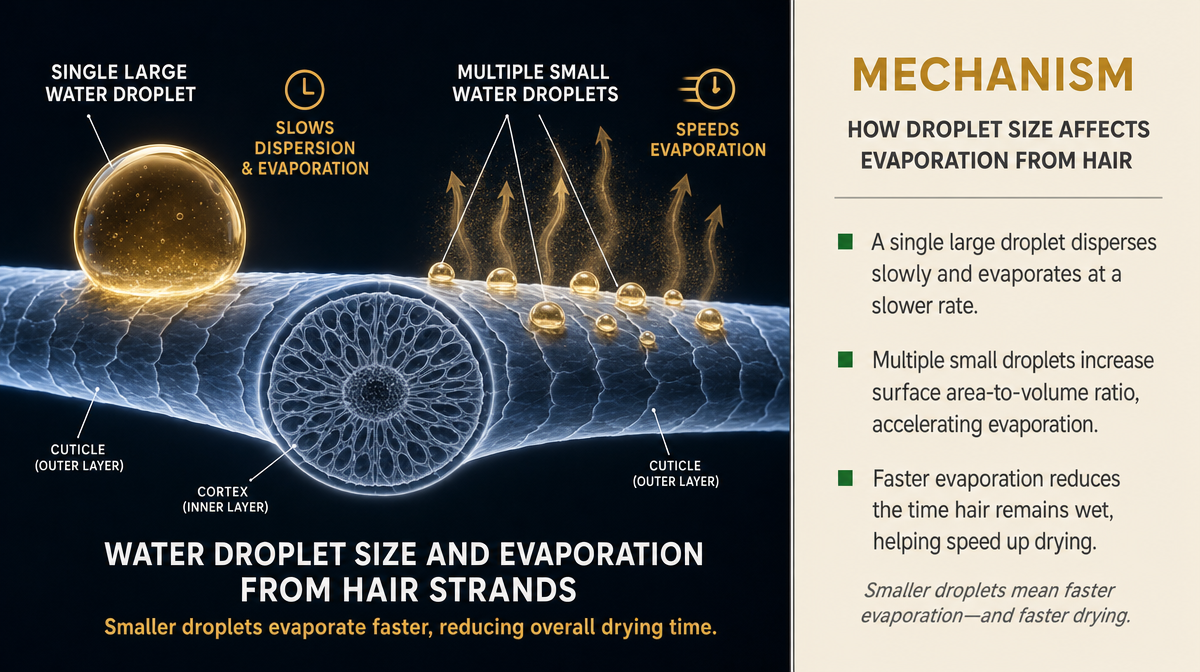
Ionic technology sounds like marketing shorthand, but the mechanism behind it is fairly simple. Negatively charged ions are released into the airstream and, on contact with water on the hair, help break larger droplets into smaller ones. Smaller droplets evaporate faster, which in theory means less time with the cuticle open and exposed to heat.
Think of it the way a fine misting nozzle on a garden hose clears a windshield faster than a single thick stream from the same hose. Same amount of water, distributed differently, gone sooner.
The 2021 Journal of Cosmetic Science research noted that ionic airflow reduced measured drying time in a small cohort of participants, though the effect was more noticeable on fine to medium hair than on very coarse or heavily textured hair, where more water is held deeper in the shaft. That distinction matters: an ionic dryer is not a universal fix, and expecting it to behave the same way on every hair type is where a lot of disappointment starts.
Reading Your Dryer Before You Blame It
Before assuming a dryer needs replacing, it helps to actually look at what it offers. Most mid-range and higher ionic dryers have a switch or button controlling the ion output, separate from heat and speed settings. If that switch has never been touched, it may be off.
Wattage matters too, though less than people assume. A 1875-watt motor moves air with more force than a 1200-watt one, which shortens drying time, but a lower-wattage dryer used with better technique will often outperform a stronger one used carelessly.
Check the concentrator nozzle as well. Many people lose or discard the narrow attachment that came in the box within the first year, then dry hair with the bare barrel, which scatters airflow in every direction instead of directing it down the strand. That single missing piece changes more than most people expect.
The Six-inch, Forty-five-degree Rule
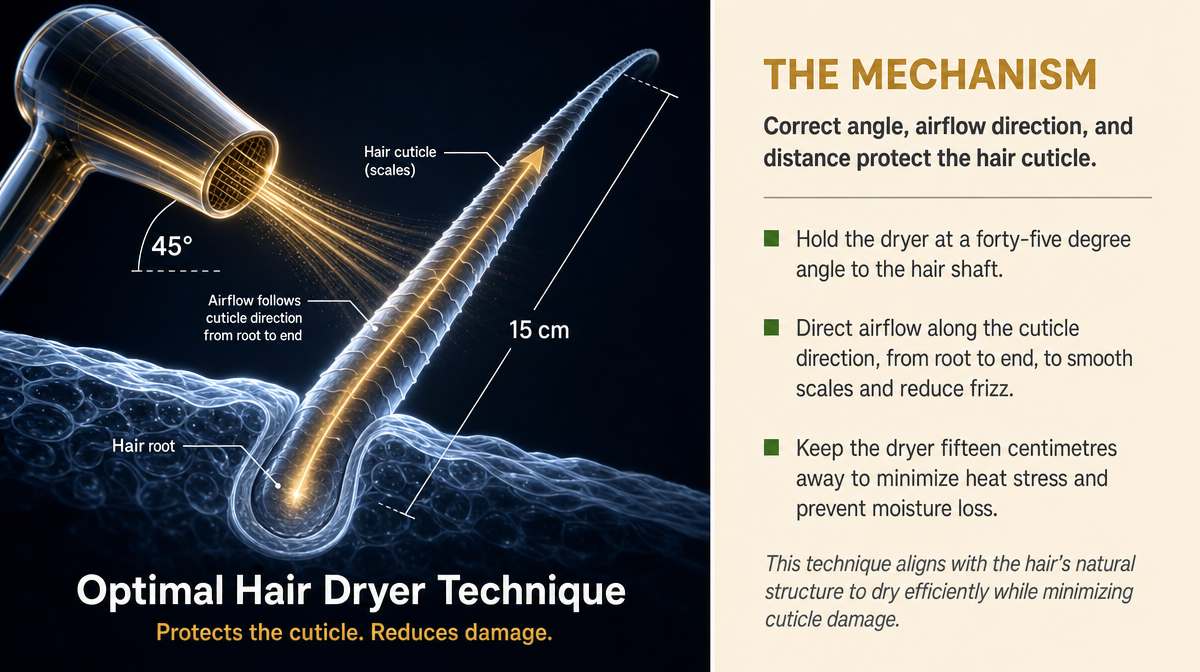
Hold the dryer roughly fifteen centimetres, about six inches, from the section being dried. Closer than that risks heat damage to the cuticle and scalp; farther away wastes the ion concentration and slows drying.
Angle matters as much as distance. Point the nozzle downward, following the direction of the cuticle from root to end, rather than straight across or upward into the section. Hair cuticles lie like roof shingles, overlapping in one direction. Airflow that runs with them helps them lie flat and reflect light, which reads as shine. Airflow against them lifts the edges, which reads as frizz, regardless of how expensive the dryer was.
A common mistake is drying in short, choppy motions close to the scalp because it feels faster. In practice, that concentrates heat in one spot and creates hot roots while the ends stay damp. A steady, continuous pass down the length of the section, repeated two or three times, dries more evenly than rapid back-and-forth movement in one place.
Sectioning Like You Mean It
Most frizz complaints trace back to skipping this step entirely. Hair dried in one large mass takes longer overall, and the sections underneath stay damp long after the surface looks finished, which is exactly the moisture that swells later in humid air.
A reasonable approach for most hair lengths is four sections: two at the crown, two lower, separated with clips. Coarser or longer hair may need six. Dry the lowest, most hidden sections first, since they take longest and are most often left half-wet.
An easy self-check: after finishing, run a hand through the underside near the nape. If it feels cool or slightly damp compared with the top layer, that section was rushed. Going back over it for another thirty seconds usually resolves what will otherwise show up as frizz an hour later.
The Cool Shot Button Nobody Uses
Nearly every ionic dryer has a cool shot button, usually blue, usually near the handle, and it is one of the most underused features on the appliance. Once a section is dry, a three to five second blast of cool air helps the cuticle contract and lie flat before it is left alone to cool naturally.
The analogy that tends to land: think of the cuticle like the shutter on an old camera lens. Heat holds it slightly open; cool air is what closes it. Skipping that step is like walking away with the shutter still ajar; hair may look dry but the surface stays more porous and more prone to picking up humidity from the air later in the day.
A quick way to judge whether this step is being used correctly: touch a finished section immediately after the cool shot. It should feel cool to the touch, not warm. Warm hair, even if visually dry, is still in a more vulnerable state and will frizz faster once exposed to outside air.
The Nozzle In The Box You Threw Out
The narrow concentrator attachment that ships with most ionic dryers is easy to lose and easy to underestimate. Without it, air disperses across a wide arc, cooling faster and losing directional force. With it, airflow is funnelled into a narrower stream that reaches the hair shaft with more consistent pressure and, by extension, more of the ion concentration the dryer is designed to deliver.
A replacement nozzle, when the original is lost, is inexpensive and sold by most appliance and beauty retailers as a universal fit for standard barrel sizes. It is worth checking the fit against the dryer’s barrel diameter before buying, since a loose nozzle wobbles and undermines the directional benefit entirely.
Users who dry without a nozzle for months sometimes report the dryer “getting weaker,” when in fact the airflow was simply never concentrated to begin with.
Judging Results Without Fooling Yourself
Hair can look dry within minutes and still be damp at the root or underneath, which is where most post-styling frizz originates. A reliable check is running fingers through several layers, not just the visible top, and feeling for any coolness or tackiness.
Another marker: hair that is fully dry moves lightly and separates into strands. Hair that still holds residual moisture tends to clump slightly and feels heavier than it looks. The Canadian Dermatology Association’s general public guidance on heat styling notes that repeated heat exposure to already-dry hair adds unnecessary damage without added benefit, which is a useful reminder that more time under heat is not the goal. The goal is drying each section fully once and moving on.
Results from better technique are usually visible the same day: less frizz by afternoon, less need for a flat iron afterward. They are not instant in the sense of looking different mid-dry, but by the time hair has cooled fully, the difference between root-to-end airflow and a rushed, scattered approach becomes obvious.
Marketing Words That Don’t Change The Airflow
Titanium plates, tourmaline coatings, far-infrared heat, ceramic barrels: these terms appear on packaging with the implication that they transform results on their own. Some do have a real, if modest, basis. Tourmaline, for instance, is a mineral that can generate negative ions when heated, which is part of why some dryers combine it with the standard ionic generator. But the presence of a mineral coating does not replace correct distance, angle, or sectioning; it supplements a technique that is already sound.
A more useful question than “does this dryer have the newest coating” is “does this dryer have an ion switch I actually use, a nozzle I still have, and a cool shot button I press.” Consumer buying guides from Canadian outlets, including Chatelaine and Canadian Living, have periodically noted that the gap in results between mid-range and premium ionic dryers narrows considerably once technique is controlled for, which lines up with what stylists tend to say in practice: the appliance sets a ceiling, technique determines how close you get to it.
A Sixty-second Test To Try Tonight
Next time hair is washed, try this before reaching for any other product. Section hair into four parts and clip three out of the way. Dry the first section using the concentrator nozzle, holding the dryer fifteen centimetres away, angled down the shaft, moving continuously rather than in short bursts. Finish with a three-second cool shot.
Move to the next section and, deliberately, skip one element: hold the dryer closer, or skip the cool shot, or dry without the nozzle. Compare the two sections once fully cool, by touch and by how the hair falls.
Most people notice a real difference after this small experiment, and it tends to be more convincing than reading about it, because it isolates exactly which habit was doing the heavy lifting.
Key Takeaways
Better results from an ionic dryer come from four habits repeated consistently: sectioning hair before starting, keeping the dryer roughly fifteen centimetres away at a downward angle, using the concentrator nozzle if it still exists, and finishing each section with a short cool shot. None of these cost anything and none require a new appliance.
A Quick Checklist For Next Wash Day
- Section hair into four to six parts before turning the dryer on
- Confirm the ion switch is turned on if the dryer has one
- Find or replace the concentrator nozzle
- Hold the dryer about fifteen centimetres away, angled down the shaft
- Move continuously rather than holding still in one spot
- Finish each section with a three to five second cool shot
- Check the underside and nape for lingering dampness before styling further
This article is for general information and does not replace advice from a qualified hair or skin care professional.
Individual results vary depending on hair type, texture, and condition.